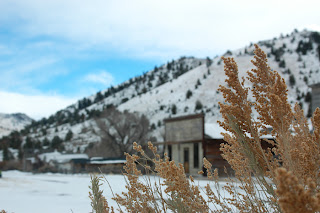
Here are a few photos that I put in my photobook that aren't on my blog yet.
Photos taken this semester:
Past Photos:
Saturday, March 19, 2011
Tuesday, March 15, 2011
Sa-weeet!
My sister had a link to this website on her blog, so I looked it up. They have AWESOME prices on canvas prints. I haven't looked into shipping yet, but I haven't ever seen prices as low as these!
http://www.artscow.com/
http://www.artscow.com/
Thursday, March 10, 2011
Poster Print
Mountain Chickadee, 36” by 24”
(I added the border to give an idea of what it looks like framed.)
-2/2/11—1:00 PM—Rexburg, ID
Canon PowerShot A1100, Auto mode, f/5.6, 1/800 sec
Canon PowerShot A1100, Auto mode, f/5.6, 1/800 sec
All Edits: I added contrast and more saturation to this image. I used the mask to lower the saturation on parts of the pine needles and the pine cones. I also used the flexible brushed-on effect the give the photograph the look that it’s been painted on the canvas.
Why this photo?: My family has a whistle. It is the mountain chickadee’s whistle. When I was little my dad would use this whistle to call me home from playing at the neighbor’s. My dad taught me to love all kinds of birds, but the chickadee has always been one of my favorites. I was walking home from class when I passed by some bushes and saw three or so little chickadees pecking at the pine cones. I quickly got my camera out of my backpack and started shooting. When I got home and looked at my shots, this one was really the only one that turned out because the birds were moving around so much. It was kind of an overcast day so my image was slightly dark. I wanted it to pop more, so I added contrast and saturation. I also chose to do the painted border because I thought it would make the image stand out as more of a work of art rather than just a photo.
Saturday, February 26, 2011
Bannack: Portraits
Welcome to Bannack, Montana! The next several blogs (all labeled beginning with Bannack) are all pictures I took in Bannack. It is a wonderfully preserved ghost town and definitely worth the trip. I hope you enjoy a little view of what Bannack has to offer.
-I had fun editing this portrait. I added some vibrance and contrast to begin with. I then copied the background layer twice. For one layer, I used a soft brush at 30% opacity to make a few minor adjustments to the image. I also added some highlights to her hair. I then added a Gaussian blur on the other copied layer with a black mask and smoothed out her skin just a bit. I liked using both techniques together.
Jake Steel: 2/22/11—12:42 PM; f/4; 1/500; Nikon D70s
-For this portrait, I upped the sats and contrast and just let the feel of the picture do the rest.
Bannack: Action Blur & Freeze
This assignment was all about playing around with shutter speed. The action shot has a very fast shutter speed whereas the ghost shot has a very slow shutter speed.
Action Blur
Longing for the Light: 2/22/11—1:14 PM; f/3.5; 5 sec.; Canon PowerShot A1100; used tripod
-To get this effect, I had the subject stand in the frame of the picture for about 2.5 seconds (half of the actual shutter opening time) and then move out of the frame very quickly. I made this picture black and white and increased the brightness and the contrast to the image just slightly. I added a flexible vignette to the picture as well.
Action Freeze
Heel Clickers: 2/22/11—2:00 PM; f/16; 1/160; Nikon D70s
-I applied a smart sharpen to this image and also boosted the contrast a little bit.
Bannack: Reverse Shallow Depth
For these shots we were supposed to show depth of field. So one of my shots is focused on the background and one of them is focused on the foreground.
Weeds (out of focus):2/22/11—1:31 PM; f/10; 1/400; Nikon D70s

Candle Sticks (foreground):2/22/11—3:58 PM; f/2.7; 1/40; macro mode, used tripod
-I added saturation and contrast to this image.
Weeds (out of focus):2/22/11—1:31 PM; f/10; 1/400; Nikon D70s
-I added saturation and contrast to this image.

Weeds (in focus): 2/22/11—1:31 PM; f/10; 1/400; Nikon D70s
-I added saturation and contrast to this image.
-I added saturation and contrast to this image.
Candle Sticks (foreground):2/22/11—3:58 PM; f/2.7; 1/40; macro mode, used tripod
-I added saturation and contrast to this image.
Candle Sticks (background): 2/22/11—3:59 PM; f/2.7; 1/40; macro mode, used tripod
-I added saturation and contrast to this image.
Bannack: Macro Abstract
For this assignment we were supposed to blend two images together using the blending modes in Photoshop.
I used this abstract picture for both of the following pictures:
-Stained: 2/22/11—3:47 PM; f/2.7; 1/60; Canon PowerShot A1100
Original
Blended
McGuffey’s Readers: 2/22/11—4:00 PM; f/2.7; 1/50; Canon PowerShot A1100; used tripod-I used the linear burn blending mode for this picture. I increased the brightness as well as changed the opacity of the abstract layer to 77%.
Original
Blended
Metallic Abstract: 2/22/11—12:39 PM; f/5.6; 1/100; Nikon D70s; used macro mode
-I used the soft light blending mode to create this picture.
Original
Plus abstract
Crackled: 2/22/11—3:47 PM; f/2.7; 1/125; Canon PowerShot A1100
Buckle: 2/22/11—4:11 PM; f/2.8; 1/6; Canon PowerShot A1100; used tripod and macro mode
-I used the lighten blending mode for this picture. I increased the brightness on the buckle layer and I put a mask on the abstract layer and made the buckle stand out a little more.
Edit: HDR (High Dynamic Range)
All of the pictures below were taken in Bannack, Montana. For these pictures I used the trial version of Dynamic Photo. You can get some pretty awesome lighting and effects with this program.
Three shots: For this picture I took three shots on a tripod at three exposure levels (-2, 0, +2). I then took all three photos into Dynamic Photo and blended them together. Once in the program, I edited the picture to bring out the saturation and I also played around with the artistic lighting.
One shot: For this one, I just took a single image and then followed the same steps above.
Three shots: For this picture I took three shots on a tripod at three exposure levels (-2, 0, +2). I then took all three photos into Dynamic Photo and blended them together. Once in the program, I edited the picture to bring out the saturation and I also played around with the artistic lighting.
Original with all three exposure levels
HDR
Abandoned Bannack
-2: 2/22/11—12:52 PM; f/8; 1/1600; Canon PowerShot A 1100; exposure -2
0: 2/22/11—12:52; f/8; 1/640; Canon PowerShot A 1100; exposure 0
+2: 2/22/11-12:53; f/8; 1/125; Canon PowerShot A 1100; exposure +2
One shot: For this one, I just took a single image and then followed the same steps above.
Original
HDR
The Mask: 2/22/11—2:12 PM; f/2.7; 1/60; Canon PowerShot A 1100; exposure +0.33
Here are a couple of others I did just for fun:
Original
HDR
Original
HDR
Cemetery Shot
Here is my best cemetery shot from the Bannack Cemetery.
How Sweet a Flower: 2/22/11—5:34 PM; f/3.2; 1/250; Canon PowerShot A1100
-I made this picture into an HDR image.
Monday, February 21, 2011
Night & Light
I loved doing this assignment. I have done a little night photography before, but it was fun to experiment with new techniques.
Camera Motion Painting: For these two shots, I set my shutter for a longer exposure and moved my camera around to create the dancing light.
To Paint a Flower: 2/19/11—10:15 PM; Blackfoot, ID; f/3.2; 15 sec.; Canon PowerShot A1100
Camera Motion Painting: For these two shots, I set my shutter for a longer exposure and moved my camera around to create the dancing light.
Swirls: 2/18/11—8:16 PM; Rexburg, ID; f/2.7; 2.5 sec.; Canon PowerShot A1100
-I increased the contrast and saturation to this picture.
Dancing Light: 2/18/11—8:15 PM; Rexburg, ID; f/2.7; 1.6 sec.; Canon PowerShot A1100
-I increased the contrast and saturation to this picture.
Moving Light Capture: For this picture I set up my tripod and put my camera on a self timer. My shutter was open for six seconds and so I got cars stopping and going. I cropped the image down to make the composition better.
Light Motion: 2/18/11—8:12 PM; Rexburg, ID; f/2.7; 6 sec.; Canon PowerShot A1100
-I added contrast and bumped up the saturation to this shot.
Light Painting: For these two shots I used the "painting with light" technique. We were in a completely dark room and the only light source was the small lights we were painting with. It was fun to see what kind things we could come up with (my husband helped me).
On the Lighter Side of Love: 2/19/11—10:03 PM; Blackfoot, ID; f/2.7; 15 sec.; Canon PowerShot A1100
-I lowered the contrast on this picture.
-I increased the contrast and made it a little darker.
This picture was an experiment, but I thought it turned out kind of cool. He stood in one location for five seconds, moved quickly, then posed for another five seconds. The result:
Fatal Blow: 2/19/11—10:09 PM; Blackfoot, ID; f/2.7; 15 sec.; Canon PowerShot A1100
-I added a little contrast to this shot, as well as lowered the brightness.
Edit: Fine Art Template
For my signature on my template, I used my mouse and made it in Illustrator instead of scanning my own signature. I tried to make it as close to my signature as possible and it is actually really close. I thought this would be just as easy and it is already on a transparent background so it works quite nicely.
Subscribe to:
Comments (Atom)


